
(Personal Project)
"G'day, tiger!" is a colloquial Australian saying, often used when speaking affectionately to active little kids. I wanted to use this saying as inspiration for a personal project, with the main aim of practicing my frame by frame animation.
"G'day, tiger!" is a colloquial Australian saying, often used when speaking affectionately to active little kids. I wanted to use this saying as inspiration for a personal project, with the main aim of practicing my frame by frame animation.
The final piece is just below.
If you're interested in my creative process, please keep reading!
If you're interested in my creative process, please keep reading!

STEP 1: Design & general concept.
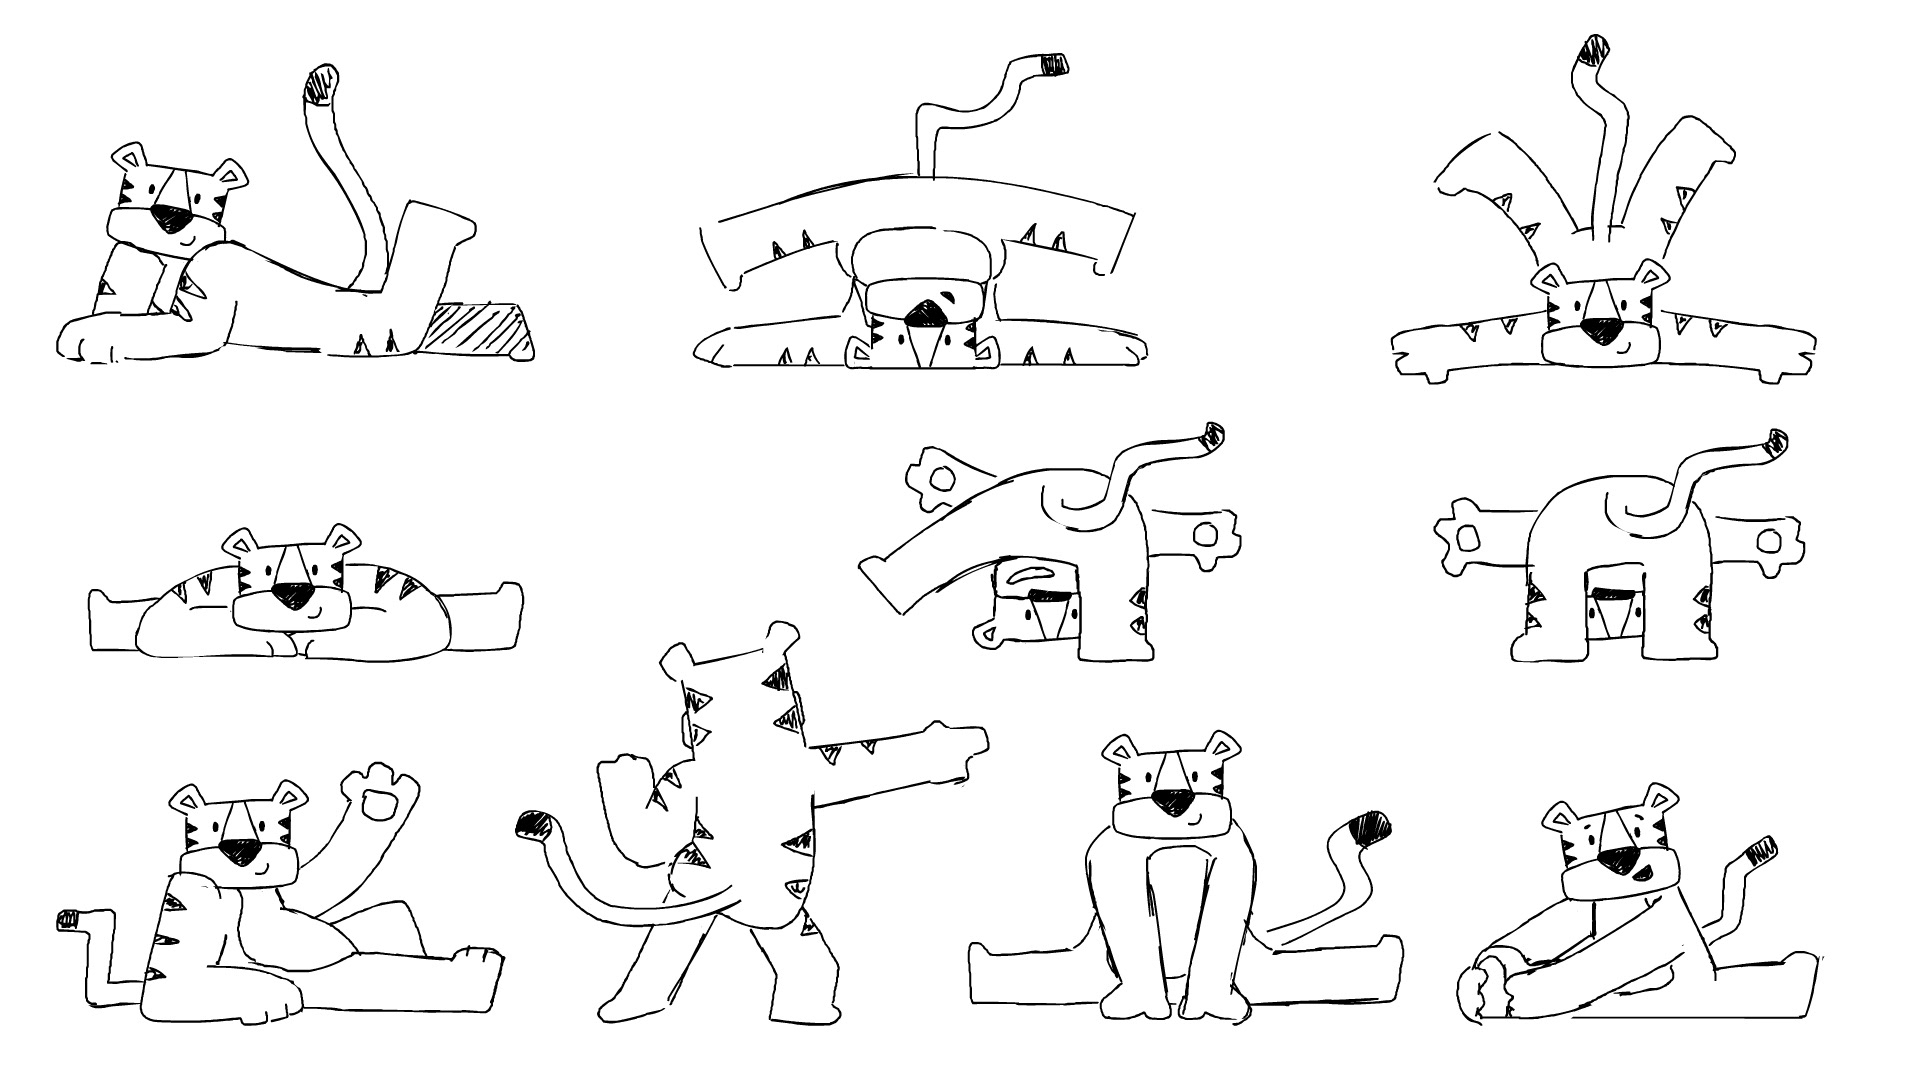
The first challenge I set myself for this project was to design a character within ten minutes. As this was a personal project, I didn't want it to take too long (Ha! As if!) I also wanted to keep the design really simple so that I could invest my time into the animation process.
I did succeed in designing him very quickly, and then I drew him in a variety of poses; exploring what I might do with him once I started animating. Other than waving at some point, I didn't have any clear plan other than making him a cute and active tiger.
STEP 2: Animation - rough.
I selected a few poses that flowed together well, and used them as a reference. Then, I just got stuck in. I animated in Adobe Animate, using the brush tool & onion skin, on two's.
I selected a few poses that flowed together well, and used them as a reference. Then, I just got stuck in. I animated in Adobe Animate, using the brush tool & onion skin, on two's.
Other than those few key reference poses, I animated straight ahead - improvising as I filled in the movement from one pose to the next, until he moved in a seamless loop. Getting the loop to work was a bit tricky, but I got there eventually.
At this point I didn't bother with facial animation. I just used a symbol for the head in one front-facing position, and drew it in by hand whenever his head was turned or backward facing.
STEP 3: Refine, refine, coffee, refine, repeat.
Once I was reasonably happy with my rough pass, I went over and over and over and over it, finessing the movement. I added frames to slow certain movements down. Added overlapping action and drag. Removed frames to make certain moves more 'snappy'.
Once I was reasonably happy with my rough pass, I went over and over and over and over it, finessing the movement. I added frames to slow certain movements down. Added overlapping action and drag. Removed frames to make certain moves more 'snappy'.
I then opened the head symbol, and animated the facial expression and ear movements inside, on their own separate timeline.
I also created a symbol for the stripes on his arms and legs. This was to maintain consistency in size and volume, but it also meant that I wouldn't have to colour each stripe on each frame. I simply had to colour my symbol once, and the entire animation would have coloured stripes. My plan was to mask them out during the colouring stage, so you can see in the example below that they occasionally extend beyond the lines of the character.
Step 4: Question why I decided to be an animator.
My next step was the cleanup. I used the pencil tool in Adobe Animate to outline the entire animation...again. I did this because I am a masochist and also because the software interprets pencil lines as strokes, as opposed to fills (like the paintbrush). Unfortunately the pencil tool is a bit of pain to draw with during the animation phase - otherwise I would have used it from the outset.
My next step was the cleanup. I used the pencil tool in Adobe Animate to outline the entire animation...again. I did this because I am a masochist and also because the software interprets pencil lines as strokes, as opposed to fills (like the paintbrush). Unfortunately the pencil tool is a bit of pain to draw with during the animation phase - otherwise I would have used it from the outset.
I took care to make sure all the lines were fully closed - in other words, each line slightly overlapped another.
STEP 5: Colour (so fun!)
Once I was done outlining, I used the paint bucket tool to fill each enclosed shape. It was so satisfying to see all the hard work of animation come together and to finally see my tiger in colour!
Once he was coloured, I highlighted everything using the 'select multiple frames' setting on the timeline, and deleted the strokes - leaving just the fills.
I then duplicated my fill layer, and used it to mask out the stripes on his arms and legs (these were animated on their own separate layer).
At this point I had attempted to animate the tail about 17 trillion times, and failed. It just so happened that it was Christmas, and I took some time off to be with my family. When I came back to work, I opened my project and got the tail animation done first try. Never underestimate the effectiveness of walking away from something you're struggling with - even if its just for an hour. For me, two weeks worked a treat!

STEP 6: Definition.
Now all I needed to do was add some definition. I decided to do this in Photoshop, mainly for the experience, but also for the great brushes. In hindsight, I think I could have done this stage in Animate, as the textured lines aren't really obvious unless its viewed at a large resolution. But it was a good learning experience.
Now all I needed to do was add some definition. I decided to do this in Photoshop, mainly for the experience, but also for the great brushes. In hindsight, I think I could have done this stage in Animate, as the textured lines aren't really obvious unless its viewed at a large resolution. But it was a good learning experience.
Using the Photoshop timeline, I went through and added definition lines to any areas that need it. In particular when his arms or legs crossed over or behind his body, thumbs etc.
Lastly, I felt he needed something to 'anchor' him to the empty world he was in. I went through once more and added a subtle shadow to every frame that needed one.
And there you have it. G'day, Tiger!